本文共 20950 字,大约阅读时间需要 69 分钟。
Enhanced ABAP Development with Core Data Services (CDS)
Data models are a cornerstone of application development. They provide a standardized method for defining and formatting database contents consistently across systems, enabling different applications to share the same data — reducing development costs, speeding time to market, and improving quality and performance.
Those familiar with application development in the ABAP world are no strangers to the traditional data modeling tools included with SAP NetWeaver Application Server (SAP NetWeaver AS) ABAP — in particular, the ABAP data dictionary (DDIC), which stores definitions of objects, such as database tables and views, that can be used in ABAP programs. And then along came SAP HANA and the new paradigm of pushing down data-intensive logic to the database layer.
To take advantage of SAP HANA for application development, SAP introduced a new data modeling infrastructure known as core data services (CDS). With CDS, data models are defined and consumed on the database rather than on the server. CDS also offers capabilities beyond the traditional data modeling tools, including support for conceptual modeling and relationship definitions, built-in functions, and extensions. Originally, CDS was available only in the design-time and runtime environment of SAP HANA. Now, the CDS concept is also fully implemented in SAP NetWeaver AS ABAP, enabling developers to work in the ABAP layer with ABAP development tools while the code execution is pushed down to the database.
This article focuses on the ABAP implementation of CDS. It looks at the concepts behind CDS, and then walks you through a detailed example that demonstrates how CDS in ABAP works, and how CDS is supported during the ABAP development process by SAP’s ABAP development tools for Eclipse.
What Is CDS?
CDS is an infrastructure layer for defining semantically rich data models, which are represented as CDS views. In a very basic way, CDS allows developers to define entity types (such as orders, business partners, or products) and the semantic relationships between them, which correspond to foreign key relationships in traditional entity relationship (ER) models. CDS is defined using a SQL-based data definition language (DDL) that is based on standard SQL with some additional concepts, such as associations, which define the relationships between CDS views, and annotations, which direct the domain-specific use of CDS artifacts. Another example is expressions, which can be used in scenarios in which certain CDS attributes are considered as measures to be aggregated.
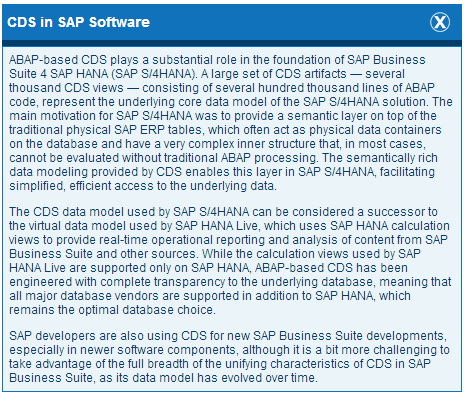
Similar to the role of the DDIC in the traditional ABAP world, data models based on CDS serve as central definitions that can be used in many different domains, such as transactional and analytical applications, to interact with data in the database in a unified way (see the sidebar "CDS in SAP Software" for more on how SAP itself is using CDS in its own applications). However, CDS data models go beyond the capabilities of the DDIC, which were typically limited to a transactional scope (think of traditional online transaction processing functionality). For example, in CDS, you can define views that aggregate and analyze data in a layered fashion, starting with basic views and then adding powerful views that combine the basic views. Another difference is the support for special operators such as UNION, which enables the combination of multiple select statements to return only one result set.
Originally, CDS was designed for native SAP HANA application development. It was introduced with support package stack (SPS) 06 for SAP HANA as part of SAP HANA extended application services (XS), an application server for SAP HANA that includes a runtime environment for native development. With SAP NetWeaver 7.4 SPS 05, the CDS concept was also fully implemented in SAP NetWeaver AS ABAP. While differences have evolved between the two variants — for example, SAP HANA-based CDS obviously operates on SAP HANA, while ABAP-based CDS operates on most major database platforms as well as SAP HANA, and each has a different type of repository for development objects — both variants pursue the same goal: to represent central data definitions as a common basis for application development of all kinds.
Each CDS variant is properly embedded into the particularities of the supported technology environment. With the ABAP variant, the integration of CDS artifacts into the ABAP stack is fairly straightforward. The artifacts are modeled and edited using the DDL editor tool within the Eclipse-based ABAP development tools for SAP NetWeaver (known as ABAP in Eclipse). CDS artifacts, like any other ABAP development object, are subject to the transport system within SAP NetWeaver AS ABAP so that they can easily be transported from a development system to quality assurance and production systems. CDS artifacts are stored in the DDIC and can be accessed in ABAP programs via Open SQL in the same manner as ordinary ABAP tables or views.
CDS in ABAP: A Step-by-Step Approach
Let’s see ABAP-based CDS in action in a real-world development scenario. Here, I’ll show you an example that demonstrates how to use CDS with SAP’s development toolset.
1. Start ABAP in Eclipse
First, you need to start ABAP in Eclipse, which is a plug-in tool for ABAP development that you install in your Eclipse workspace. (If you do not yet have a local installation of Eclipse, simply download the latest version — currently Mars — to your desktop.) SAP’s Eclipse-based plugins, including ABAP in Eclipse, are available from its tools update site ().
先安装Eclipse,注意版本问题。
*-----------------------------------------------------------------------------------------------------------------------------------------------
SAP Development Tools for Eclipse - Mars Software Repository
This software repository URL https://tools.hana.ondemand.com/mars provides access to SAP Development Tools for .
It is intended to be used in the Help > Install New Software wizard of Eclipse. For more information about installing software, see the .
If you have any problems installing the software, please check the document .
The downloads are provided under the terms of the .
Back to .
*-----------------------------------------------------------------------------------------------------------------------------------------------To start ABAP in Eclipse, open the Eclipse project explorer and switch to the ABAP development perspective. To begin development work, establish a connection to the ABAP back end by creating an ABAP project (in the example, M36_001_d002831_en). With this connection, you can create new ABAP repository artifacts, such as ABAP programs, classes, and, as in our example, CDS artifacts.
You can create these repository artifacts as local objects belonging to the $TMP package, but in this example we use an existing package called ZDEV201 to house the CDS artifact. Simply right-click on the package icon, and from the context menu select New > Other ABAP Repository Object (seeFigure 1).
Figure 1 — Create a new repository object
2. Create a New CDS View
In the New ABAP Repository Object pop-up, search for the DDL source editor and select it to launch the New DDL Source wizard (see Figure 2). First, specify the basic properties of the view. In the example — which is a simple scenario based on SAP’s well-known Enterprise Procurement Model (EPM) demo model — we want to count open invoices that have not yet been paid by business partners. So we specify the technical name (ZDDLS_E2E_INV_COUNT_201) and some short text to describe the view (“CDS view: open invoice count”). The underlying package (ZDEV201) is assigned automatically.

Figure 2 — Specify the basic properties of the view
Note that one of the fundamental differences between CDS in native SAP HANA and CDS in ABAP lies in the view definition. In both the ABAP and SAP HANA scenarios, you begin your development work by creating views on top of existing database tables that are contained in the DDIC. With CDS in native SAP HANA, you must create the basic entity types that correspond to the DDIC tables as part of the CDS view definition. With CDS in ABAP, you can simply refer to any underlying DDIC table, view, or type from within the CDS view definition, avoiding the need to “duplicate” the DDIC table definitions on the CDS layer. In the ABAP scenario, the CDS definitions are considered DDIC artifacts and need to be activated like any other DDIC artifact, and when changes are made, their impact is propagated to dependent artifacts.
3. Assign a Transport Request
On the next screen of the New DDL Source wizard, assign a transport request for the view (see Figure 3). After assigning the view’s DDL source to an existing ABAP package, either select an open transport request or create a new one, which you can use to keep track of the changes that make up your development tasks. This transport request can be bundled with tasks from other developers and later transported to a subsequent system for test and then production.

There is no need to go to the lower levels of the underlying database (such as SAP HANA) to manage the transport of CDS artifacts. All changes and transports are managed in the ABAP layer end to end.
4. Select a Template for the CDS View
The last screen of the New DDL Source wizard (Figure 4) offers a selection of templates for creating a CDS view, including a display of the default syntax provided with each. There is a template for a basic view; templates for building views with more advanced features (such as joins, associations, and parameters); and a template for extending a view (by adding fields, for instance). For the example, we choose the basic view template.
The templates include placeholders for code that you fill in step by step. If you later discover the need to change or extend the nature of your CDS view, you can always change the source code directly in the DDL editor and freely edit all parts of it as needed. This is particularly helpful if you want to copy portions of the source code from example code, for instance.
5. Complete the Coding for the View Definition
After selecting the template and clicking on Finish, you are ready to fill the placeholders provided by the template to complete the definition of our view ZDDLS_E2E_INV_COUNT_201 (see Figure 5). Open the DDL editor — which is a source code editor that offers very rich context-sensitive code completion capabilities — from the project perspective in the Eclipse project explorer via the context menu.
First, specify an ABAP repository name for the view — ZV_INVCNT_201 in the example. The text label and view name are filled in automatically based on the information entered when specifying the basic properties of the view. Then specify the target data source for the invoice count. The underlying base table to be used as the target data source is named sepm_sddl_so_invoice_header (referenced as “inv”) but with the code completion functionality included with CDS, you don’t have to remember long names like these — you can simply start typing a prefix, such as sepm_sddl_so, and all matching base tables are displayed in a list, where you can view the details of each table (such as fields and their types) and select the table you want.
You can view the details of any of the syntactical elements that make up a CDS view definition on the fly by pressing the F2 key. The tooltip pop-up shows all the attributes, the corresponding data elements and types, and the associations (relationships) between the element and other tables or views, including their cardinality. For instance, in the example, the tooltip pop-up shows that the invoice header table contains a number of associations, including an association with a buyer table. With the tooltip functionality, there is no need to navigate deeply inside the DDIC — all of the relevant information is visible in one place.
6. Add Any Associations
For the view to count the number of open invoices, it needs to collect information about the buyer, such as the customer ID and name. To enable this, navigate along the association between the view’s underlying invoice header table and the buyer table, which is syntactically facilitated by a path expression separated by dots. To add the association to the view definition, you type a reference to the invoice header table (“inv”) followed by a dot (see Figure 6). A list of available attributes, including associations, appears once you have typed the dot.
Select “buyer” to add the association to sepm_sddl_businesspartner, which is a view that encapsulates the buyer table, to the view definition, and then add another dot to display the columns available in the “buyer” view (see Figure 7). Add the columns you need to count the open invoices: business_partner_id, company_name, and address_key. Figure 8 shows the completed code.
Figure 7 — Define the association
7. Execute the Code and View the Results
With CDS, you can activate and test your code right away by pressing the F8 key, which immediately previews the results in the data browser (see Figure 9).

Additional Options for Refining CDS Views
Let’s look at a few different ways you can fine-tune a CDS view to get the result set that best meets your needs.
Using Aggregation and Grouping
In the example scenario, the result set includes all business partners, not just the ones that have not yet paid their invoices. We can refine the results by manually adding a counter in the source code (see Figure 10).
The count function requires a group by clause, however, which is missing from our source code. Using the quick-fix capabilities of Eclipse, we can add the missing group by clause with a single click. Click on the highlighted select statement and choose Add Group by Clause, which automatically inserts thegroup by clause containing the elements you defined for the count (see Figure 11). To restrict the result set, we manually add a simple where clause that returns results with a payment status other than “P” for paid (see Figure 12).
双击前方的错误标记,或者使用快捷键填充Group By
Figure 11 — Add a group by clause to the counter
Now you can rerun the CDS view by pressing the F8 key, which reveals that the result set of the view is still raw — it contains address keys, which are GUIDs pointing to address records, when the actual city and street names would be more useful (see Figure 13).
Using View Hierarchies and Associations
To show the city and street names in the result set, instead of the GUIDs pointing to address records, define a second CDS view that declares an association to the addresses of the business partners.
First, create another view called Zddls_E2e_Cust_Classify_201 in the ZDEV201 package, as described previously (see Figure 14). Specify the basic properties of the view in the New DDL Source wizard, such as the technical name (ZDDLS_E2E_CUST_CLASSIFY_201) and some short text to describe the view (“CDS view: customer classification”).

On the transport request screen (Figure 15), assign the newly created view to the open development request, and on the view template screen (Figure 16), choose Define View with Association. The syntax for this is slightly more complicated — the association contains an “on” condition, which is similar to a join operation.

Figure 15 — Assign a transport request for the second view

After selecting the template, open the DDL editor to complete the view definition. As with the first view, specify an ABAP repository name for the corresponding ABAP view (ZV_CUSTCLSFY_201 in the example). Again, the text label and view name are filled in automatically. Then specify a data source for the view, which is the first view created in this example (Zddls_E2e_Inv_Count_201), along with a target data source for the association created by the template. As before, pick a data source with the aid of the code completion functionality by typing the prefix sepm_sddl and selecting sepm_sddl_address (referenced as “_address”) from the matching items (seeFigure 17).
Next, fill out the “on” condition defining the source and target columns that are connected by the association. For the source, specify the first view Zddls_E2e_Inv_Count_201 and select address_key from the displayed list of available columns (see Figure 18). For the target, specify the target data source (referenced as “_address”) for the association and select the corresponding address_key from the displayed list of available columns (seeFigure 19).

Figure 18 — Define the source for the association
Using View Fields and Expressions
The next step is to define the view fields. The system tells you that the address_key column needs to be part of the view’s signature (because it is the link between the two views), so quickly add it by typing the prefix “ad” and using the code completion functionality (see Figure 20). Likewise, add customer ID and customer name. Figure 21 shows the completed definition of the view fields for the association.
Figure 20 — Define the view fields for the association

Finally, to demonstrate the versatility of CDS, let’s add a calculated field that is based on conditions that need to be met. To define this field, manually add a case expression (see Figure 22). The completed case expression for the example (Figure 23) delivers a category field that assigns a certain value depending on the number of open invoices: “C” for less than 5,000; “D” for between 5,000 and 10,000; and “S” for more than 10,000.

Figure 22 — Add a case expression to enable a calculated field
Lastly, add view fields that contain address information by specifying the target data source — “_address” (see Figure 24) — and then selecting country, street, city, and postal code from the list of available columns (see Figure 25).
Figure 24 — Specify the data source for the view fields
Figure 26 shows the completed code.
Viewing the Refined Results
Activate and run the view, which displays the results shown in Figure 27. As you can see, all of the refinements are reflected in the data browser.

The association details defined in the DDL editor are also integrated into the data browser. As in the DDL editor, you can navigate along the various associations, meaning that you can select a row and view a list of associations, such as address (see Figure 28). Selecting an association will display the resulting record that is referred to by the association (see Figure 29), which can be used for testing and analysis.

Figure 28 — Navigating along an association in the data browser

Figure 30 shows our completed CDS artifacts in the Eclipse project explorer.

Summary
SAP NetWeaver 7.4 brings the CDS concept introduced for native SAP HANA development to the ABAP development world. Powerful CDS functions such as associations and annotations are fully integrated into ABAP in Eclipse, and assist developers at each step of the definition process. And since CDS is executed at runtime directly on the database layer, it facilitates the code pushdown paradigm pioneered by SAP HANA right from the beginning. With these features on hand — along with the CDS enhancements included in the upcoming 7.5 release of SAP NetWeaver — developers will have the tools they need to succeed in a modern business landscape.

Shortcut Key

Create By :Xiuxianhai